Editor’s Note: Last modified on November 6, 2025, by Lucy
Need to protect your custom metal parts from wear or corrosion? A perfectly machined part that rusts or scratches in a week is a failed part. Here’s how to choose the right finish.
Surface treatment is a manufacturing process that alters a part’s surface to improve properties like corrosion resistance, wear resistance, or appearance. Common methods include anodizing, plating, powder coating, and passivation.
After more than 20 years of running a machine shop, I can tell you this: the finish is just as important as the machining. For an engineer or a sourcing manager, choosing the right finish isn’t just about looks. It’s about function. It’s about ensuring the part you spent good money on will actually last in the real world. A customer once brought me a beautifully machined steel part that was completely rusted after just two weeks in storage. They had skipped a simple passivation step to save a few dollars. Don’t make that mistake. This guide is my shop-floor view on the most common finishes, what they’re really for, and the “must-know” details for any designer.
Electrochemical Treatments? (Using Electricity)
These processes use an electric current in a chemical bath to change the surface of a part. They are high-precision and very common for high-performance components.
Anodization Anodic Oxidation
Struggling with aluminum scuffs or corrosion? Anodizing is the answer. It’s a must-have for aluminum parts, from consumer electronics to aerospace brackets.
Anodizing is an electrochemical process that grows a hard, durable, corrosion-resistant oxide layer on the surface of aluminum parts. It is not a paint or a coating; it’s a conversion of the metal itself.

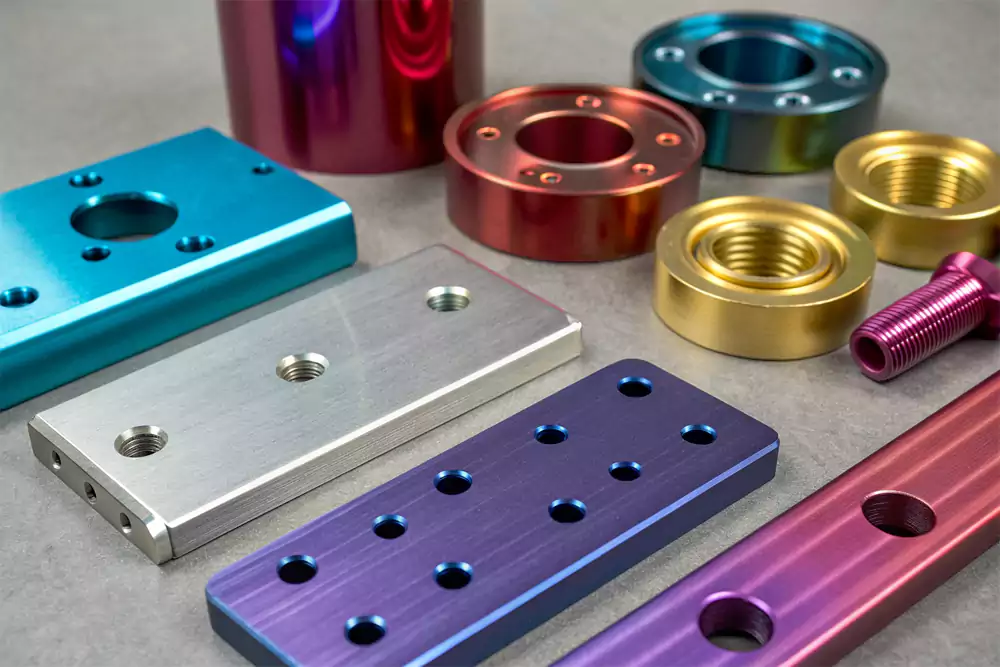
This is our go-to for aluminum. The “Type II” anodizing we do is for corrosion resistance and cosmetics (it can be dyed in different colors like black, red, or blue). “Type III” or “hardcoat” creates a much thicker, harder-wearing surface.
The Machinist’s Secret: Engineers must account for dimensional change. Anodizing isn’t a coating; it grows from the material. This means it adds to the surface. A typical Type II anodize will add about 0.005mm to 0.01mm (0.0002″ – 0.0004″) to any surface. If you have a hole with a tight bearing fit, you must tell your machinist to machine it slightly oversized to compensate.
Electroplating process
Need to make a part conductive, slick, or wear-resistant? Plating adds a thin layer of another metal (like gold, nickel, or zinc) on top of your base part.
Electroplating uses an electric current to deposit a thin layer of one metal onto another. This is used to add properties the base metal doesn’t have, such as conductivity, wear resistance, or sacrificial corrosion protection.

This is an old-school process but still critical. We often see steel parts that require Zinc Plating (for corrosion resistance) or Nickel Plating (for wear and corrosion). We also plate gold or silver onto copper contacts for electrical conductivity.
The Machinist’s Secret: Just like anodizing, plating adds thickness. A good machinist needs to know before they start cutting that a part will be plated. We will intentionally machine the part slightly undersized so that after plating, it’s perfectly in tolerance. Communication here is everything.
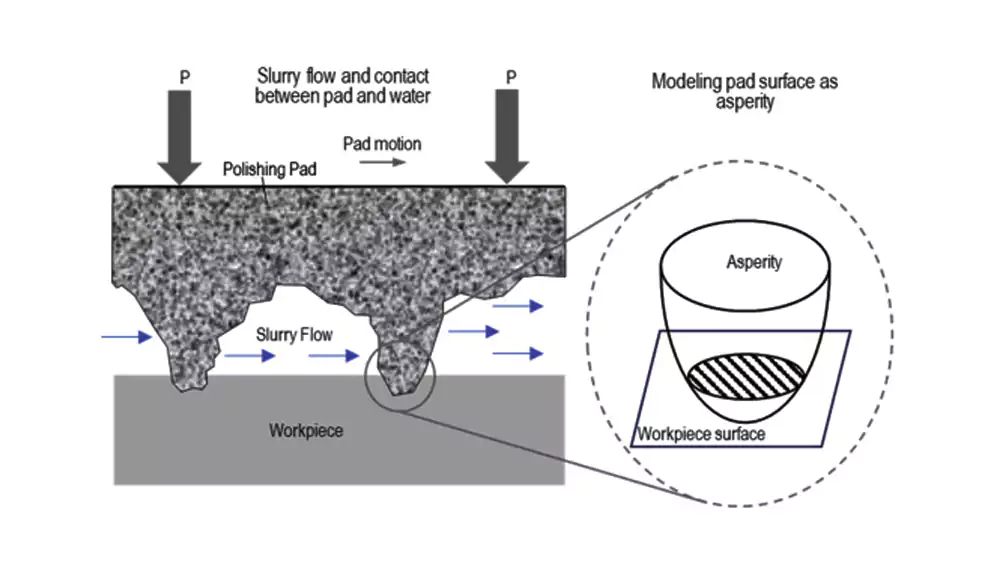
Electropolishing
Have a stainless steel part for a medical or food-grade application? Do you need it to be ultra-clean, micro-smooth, and burr-free? This is the process you’re looking for.
Electropolishing is an electrochemical process, often called “reverse plating.” Instead of adding material, it removes a microscopic layer from the surface, smoothing out peaks and valleys to create a bright, passive, and ultra-clean finish.

The Machinist’s Secret: This is my go-to process for high-purity 316L stainless parts. It’s fantastic because it not only makes the part look incredible, but it also removes any microscopic burrs from machining, especially in hard-to-reach internal areas. The key for engineers to know is that this process removes material. We have to plan for this. We typically expect it to remove 0.005mm to 0.01mm (0.0002″ – 0.0004″) from all surfaces. If you have a critical bore with a “plus-only” tolerance, we must machine it slightly oversized so that after electropolishing, it lands perfectly in spec.
Chemical Treatments? (Using a Chemical Bath, No Electricity)
These processes use a chemical-only reaction (no electricity) to create a protective “conversion coating” on the metal’s surface.
Passivation
This is an absolute must-do for stainless steel parts, but many people don’t know what it is. It’s not about making it “passive,” but about making it more resistant.
Passivation is a chemical process that removes free iron and other contaminants from the surface of stainless steel. This allows the steel’s natural chromium oxide layer to form, dramatically improving its corrosion resistance.
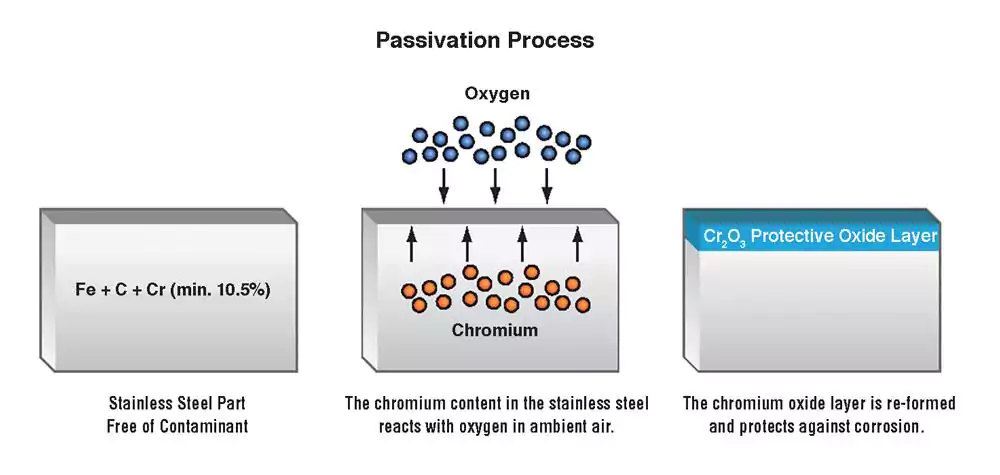
When we machine stainless steel, tiny iron particles from our cutting tools get embedded in the surface. If you leave them there, those iron particles will be the first things to rust, making it look like your expensive stainless steel is failing. Passivation (usually a citric or nitric acid bath) dissolves those free iron particles.
The Machinist’s Secret: Passivation is not a coating. It does not change the dimensions of the part in any measurable way. It’s a final cleaning step, and it is absolutely essential for any medical or aerospace component.
Black Oxide
Need a cheap, simple way to make steel parts look good and stop them from flash-rusting? Black oxide is a great-looking, low-cost option.
Black Oxide is a chemical conversion coating for steel, iron, and stainless steel. It creates a black, porous surface that offers mild corrosion resistance and improved lubricity.
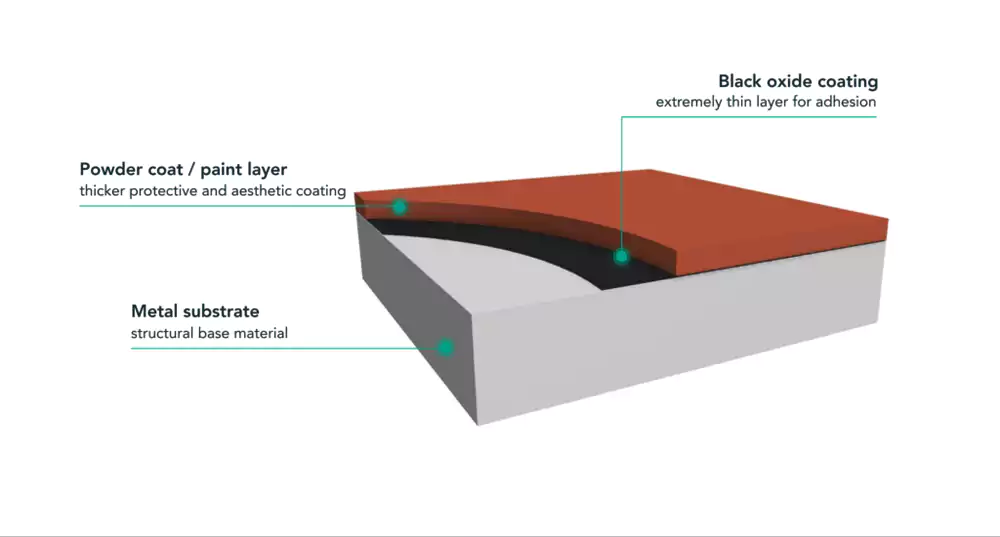
This is mainly for looks and mild corrosion protection (it’s not for harsh environments). The black surface looks very professional, and the porous nature of the finish is great at holding oil or wax to prevent rust.
The Machinist’s Secret: The dimensional change is minimal (less than 1 micron), so you almost never have to worry about it affecting your tolerances. It’s a great, low-cost “default” finish for simple steel parts that will be kept indoors.
Mechanical Treatments? (Using Physical Force)
These finishes change the part by physically or mechanically altering the surface texture.
Sandblasting (Media Blasting)
Need a uniform, non-directional, matte finish? This is how you get it. It’s also the best way to prepare a surface for paint or powder coating.
Media Blasting involves firing a high-pressure stream of abrasive media (like glass beads or aluminum oxide) at a part to strip contaminants and create a uniform surface texture.
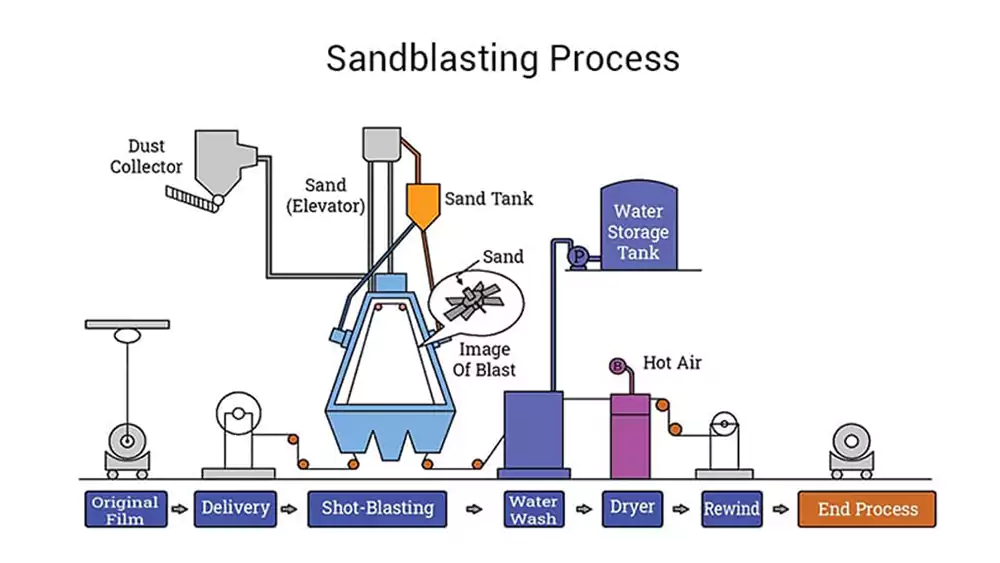
When engineers say “sandblasting,” what they usually want is Bead Blasting. We use fine glass beads instead of sand. This gives the part a beautiful, soft, satin finish that hides tool marks and fingerprints. It’s my favorite finish for aluminum parts that won’t be anodized.
The Machinist’s Secret: This process is aggressive. It will remove a tiny amount of material and can “dull” sharp edges. You must mask off any critical threads, bores, or sealing surfaces before blasting, or you risk damaging them.
Polishing
Need a part to be truly reflective, like a mirror? Polishing is the art of making a surface perfectly smooth.
Polishing is a multi-stage mechanical process of using finer and finer abrasives to smooth a metal surface, eventually resulting in a bright, mirror-like finish.
This is pure, labor-intensive skill. We use a series of buffing wheels and abrasive compounds to remove all surface imperfections. This is common for high-end decorative parts or medical/food-grade applications where you need a surface that’s easy to clean.
The Machinist’s Secret: Polishing is not good for holding tight tolerances. The process inherently removes material and rounds edges. If you need a part to be both mirror-polished and dimensionally critical, the design and process must be planned very, very carefully.
Painting & Coating? (Adding a Layer)
These processes add a completely new layer of material on top of the part for maximum protection.
Powder Coating
This is your most durable and protective option. If you need a part to survive outdoors or in a tough industrial environment, this is what you want.
Powder Coating is a process where a dry, free-flowing powder is applied to a part electrostatically and then cured with heat, creating a hard finish that is tougher than conventional paint.
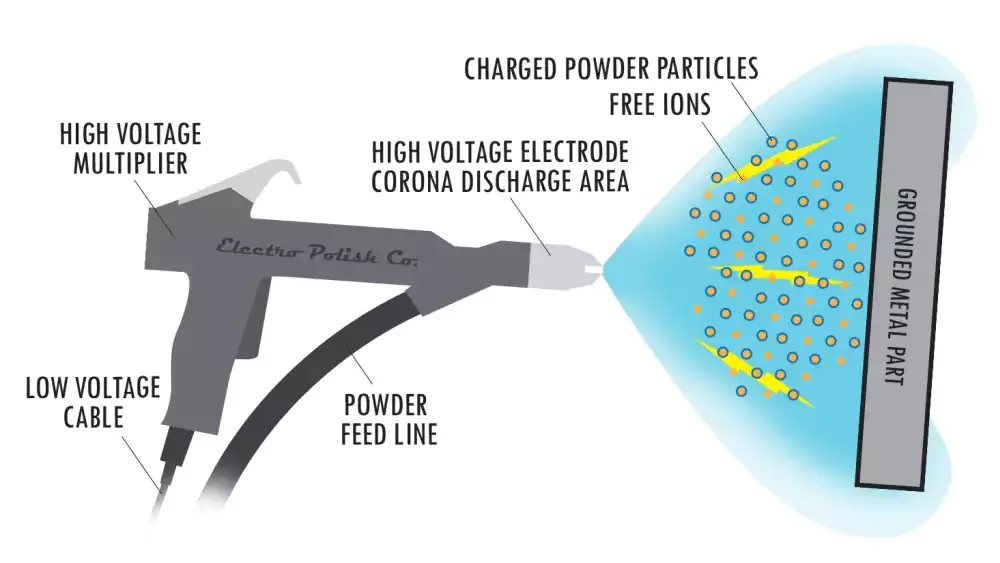
This stuff is fantastic. It’s thick, it resists chemicals and abrasion, and it comes in any color you can imagine.
The Machinist’s Secret: Powder coating is thick. A single coat can be 0.05mm to 0.15mm (0.002″ – 0.006″) thick. This is a huge dimensional change. Any threaded holes, pins, or tight-fit surfaces must be masked with high-temperature silicone plugs or tape. We have to plan this with the engineer from day one.
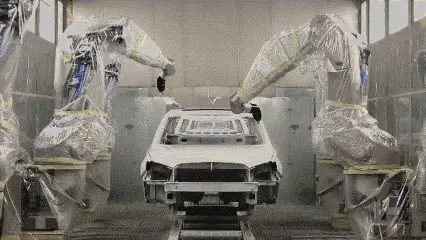
Spray Painting (Wet Coating)
Need a specific color match or a flexible coating on a budget? Powder coating is durable, but it’s thick and requires an oven. Spray painting is the versatile, low-cost alternative.
Spray Painting is the application of a liquid coating (like polyurethane, epoxy, or enamel) to a part’s surface using an atomizing spray gun. It is then air-dried or cured at a low temperature.
The Machinist’s Secret: The main trade-off here is durability versus cost and precision. Wet paint is almost never as tough or impact-resistant as powder coating. However, it’s fantastic for parts that can’t be heated in an oven, or for when you need to lay down a very thin, controlled layer (often 0.02mm to 0.05mm). The key for any engineer is to specify the surface prep. If you just call for “paint,” you’ll get a poor job. You must call out the primer and the surface profile (e.g., “prep per SSPC-SP 6, apply one coat epoxy primer…”). Like all coatings, all threads and datums must be masked.
Hot-Dip Galvanizing
Need to protect a large steel fabrication from rust for 20 years, even outdoors? This is your heavy-duty, industrial-strength solution.
Hot-Dip Galvanizing is a process where a finished steel or iron part is submerged in a bath of molten zinc (at ~450°C / 850°F). This creates a thick, durable, and sacrificial layer of zinc-iron alloys that provides exceptional, long-term corrosion protection.

The Machinist’s Secret: This is not a precision finish. Let me repeat that: this is not for precision machined components. This is for structural steel, trailers, and large weldments. The high heat will warp any thin-walled or complex machined part. More importantly, the coating is extremely thick and uneven—it can easily be 0.08mm to 0.15mm (0.003″ – 0.006″) thick. Any threaded hole will be completely sealed and must be re-tapped after galvanizing. Engineers must design for this from the start, leaving huge clearances.
Vacuum Metalizing (PVD)
Need a part to look like chrome, but it’s made of plastic? Or need an ultra-hard, low-friction coating on a cutting tool or high-performance part? This is the high-tech solution.
Vacuum Metalizing, which includes PVD (Physical Vapor Deposition), is a process where a coating material is vaporized in a high-vacuum chamber. This vapor then travels and condenses onto the part, forming a very thin, hard, and uniform film.

The Machinist’s Secret: This is a “line-of-sight” process. That’s the must-know detail. The coating “sprays” in a straight line, so it will not easily coat the inside of deep, narrow holes or hidden features. Parts often need to be on complex fixtures that rotate them to get full coverage. The big advantage for us machinists is that these coatings are extremely thin (often just 2 to 5 microns, or 0.002mm to 0.005mm). This means for 99% of machined parts, the coating thickness is so minimal that it does not affect the part’s tolerances. It’s a high-cost, high-performance finish for applications like cutting tools (the “TiN” gold coating) or high-end decorative parts where you need a durable metallic look.
Case Study: Choosing the Right Coating
All these options can be confusing. Let me show you how we helped a client (an engineer at a high-end audio company) navigate this for a new product.
The Challenge: The client was designing a new premium audio amplifier enclosure. They had CNC-machined the housing from a solid block of 6061-T6 Aluminum. They needed a finish that was:
- Aesthetic: A premium, non-reflective “satin black” finish.
- Durable: Able to resist scratches and fingerprints.
- Precise: Cannot clog fine ventilation slots or affect the fit of the backplate.
The “Shop Talk” Solution: The client’s first thought was Powder Coating because it’s tough. I immediately advised against it. Why? Powder coating is too thick. It would have clogged their delicate vent slots and made the part look “plasticky” and cheap, not premium.
Instead, we proposed a two-step “mechanical + chemical” process:
- Step 1: Mechanical Prep (Bead Blasting)
- We first took the machined aluminum housing and lightly bead blasted it with 80-120 grit glass beads.
- Why? This step was critical. It removed any microscopic tool marks from the CNC machining and gave the entire part a uniform, non-directional, beautiful satin texture. This is the secret to that “premium” feel.
- Step 2: Electrochemical Finish (Anodizing)
- After blasting, we put the part through our Type II Black Anodizing process.
- Why? The anodizing chemically bonds with the aluminum, creating a hard, scratch-resistant surface. Because the surface was already textured from blasting, the final finish wasn’t a cheap, high-gloss black. It was the deep, rich, satin black they wanted.
- Tolerance Control: We calculated that the Type II anodizing would add about 0.008mm to the surface. We communicated this to the client, and they confirmed this was perfectly acceptable for their assembly (we just had to mask the internal threaded holes).
The Result: The client was thrilled. By combining bead blasting (for texture) and anodizing (for color and durability), we gave them a finish that was both beautiful and tough. It looked and felt like a high-end product, and all parts assembled perfectly. This is the kind of problem-solving that a good manufacturing partner brings to the table.
Choosing the Right Process: My Quick Guide
From my experience, here’s how to think about surface treatment selection:
- For aluminum corrosion resistance: Start with anodizing
- For steel corrosion protection: Zinc plating or powder coating
- For wear resistance: Hard chrome or hard anodize
- For electrical conductivity: Stick with plating or leave bare
- For food/medical applications: Passivation or electropolishing
Always consider your operating environment, dimensional requirements, and budget. And here’s a pro tip: Don’t over-specify. I’ve seen customers pay for military-grade coatings on indoor equipment – it’s like using a sledgehammer to crack a nut.
Common Mistakes I See (And How to Avoid Them)
The biggest mistake? Not considering surface treatment until it’s too late. If you wait until after machining, you might find your beautiful part can’t be properly treated. Always:
- Specify coating requirements on your drawings
- Consider masking needs for critical features
- Account for dimensional changes from coating buildup
- Discuss your application environment with your supplier
Summary:
Surface treatment is the final touch that ensures your parts perform as designed. Whether you’re protecting against corrosion, reducing wear, or just making things look professional, the right choice pays dividends in the long run. When in doubt, talk to your machine shop early – we’ve seen what works and what doesn’t in real applications.
Need help with surface treatment selection?
Reach out – we’re happy to share what we’ve learned from two decades in the shop.
