Table of Contents:
Custom Machining Pre-quote Preparation: A Practical Guide for Buyers
- November 22, 2024
- Tony
- Last updated on November 11, 2025, by Lucy
When you’re asking for a custom machining quote, how you prepare directly impacts the accuracy, speed, and competitiveness of the pricing you receive. After reviewing hundreds of projects, I’ve found that buyers who provide complete information upfront get better quotes—often 15-20% lower due to reduced back-and-forth and engineering time.
1. What do I need to prepare before getting a quote?
The Golden Triangle of Quote Preparation
There are three elements that make or break your quote request:
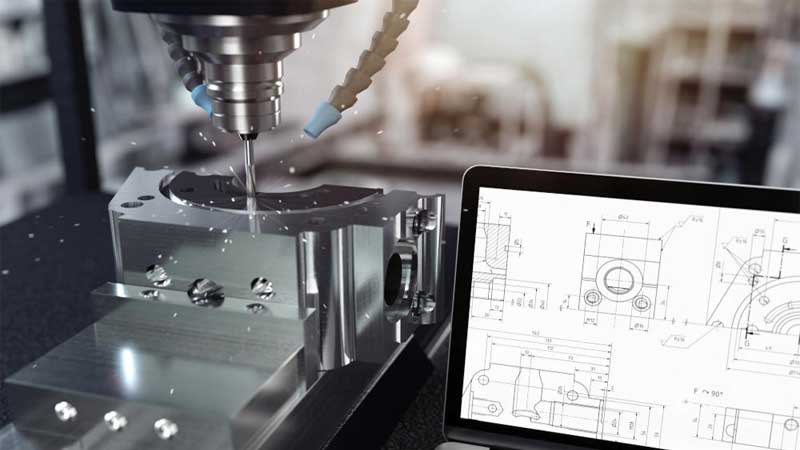
1. Technical Documentation That Actually Works
You wouldn’t believe how many quotes get delayed because of drawing issues. Here’s what actually works in the real world:
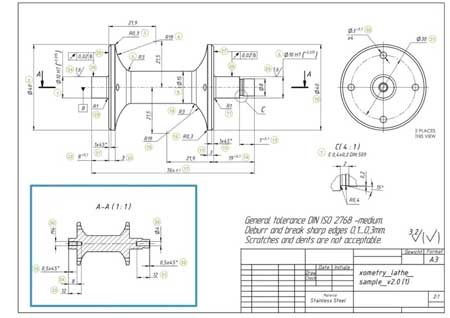
- Provide both 3D CAD (STEP, IGES) and 2D PDF drawings—our engineering team needs both to understand your vision completely
- Label critical dimensions and tolerances clearly—if it’s critical, make it obvious
- Call out surface finish requirements directly on the drawing—don’t bury them in emails
- Include a title block with part name, number, and material specification—basic but often missing
I once received drawings where tolerances were scribbled on a napkin. Seriously. Don’t be that person.
2. Material Specifications Beyond "Stainless Steel"
The material you choose impacts not just material costs but machining time too. For instance, titanium costs more to machine than aluminum, and 316 stainless is harder to machine than 304. Be specific:
- Material type and grade (e.g., 6061-T6 Aluminum vs. “some aluminum”)
- Temper or hardness requirements when applicable
- Material certifications needed (e.g., Mill Certs, RoHS compliance)
- Alternative materials you’d consider—sometimes there’s a more cost-effective option
3. Quantities and Timeline Reality Check
Be honest about your needs:
- Prototype quantities vs. production volumes—this affects setup approach
- Your actual timeline vs. your ideal timeline
- Expected repeat orders throughout the year—this helps us optimize tooling
2. The Hidden Details That Make or Break Your Budget
Tolerances
Here’s a little secret from the shop floor: tolerance tightening follows a cost curve that looks more like a hockey stick than a straight line
- Standard tolerances: ±0.005″ or ±0.13mm—no extra charge
- Tight tolerances: ±0.001″ or ±0.03mm—cost increases about 20-30%
- Very tight tolerances: ±0.0005″ or ±0.013mm—cost can double or triple
Only specify tight tolerances where absolutely necessary. That’s the single biggest cost-saving advice I can give you
Surface Finishes
Those beautiful mirror finishes don’t happen by accident—they happen through additional processes that cost time and money
- As-machined: Standard finish, most cost-effective
- Bead blasting: Good for uniform matte appearance
- Anodizing: Adds corrosion resistance and color options
- Powder coating: Thick, durable protective coating
- Polishing: Labor-intensive, premium cost
Quality and Inspection Requirements
If you need first-article inspection, material certifications, or specific quality documentation, say so upfront. These take time, and time is money.
📌Case Study: The Aerospace Bracket That Saved 35%
Here’s a real example (with details changed to protect the client) of how proper preparation and collaboration led to significant savings. This case would fit perfectly after introducing the main concepts but before the conclusion, as it demonstrates their practical application.
The Challenge: A client needed a mounting bracket for an aerospace application. Their initial request was for a titanium bracket with multiple tight tolerances (±0.0005″) across all dimensions and a complex 5-axis machining approach.
Initial Specifications:
- Material: Aerospace-grade titanium
- Quantity: 250 pieces
- Tolerances: ±0.0005″ on all dimensions
- Surface finish: Anodized per MIL-A-8625
- Delivery: 8 weeks
The Collaborative Redesign:
After reviewing their application, we worked together to optimize the part for manufacturability:
- Switched to aluminum 7075-T6 for non-critical structural areas, reserving titanium only for high-stress interfaces
- Relaxed tolerances to ±0.002″ on non-critical features, maintaining tight specs only where mating components interfaced
- Simplified two complex internal pockets that required special tooling
- Adjusted the anodizing specification to a standard industrial grade where possible
The Results:
- 35% reduction in total cost
- Lead time reduced from 8 to 5 weeks
- Maintained 100% of functional requirements
- Received first articles approved with zero revisions
The key was their openness to discuss the actual application rather than just the initial design. This case perfectly demonstrates why you should involve your machining partner early in the process.
3. Selecting the right custom machining process
The selection of the machining process directly determines the manufacturing method and cost of the product.
- CNC machining:
Suitable for high-precision and complex geometry parts, especially for small-lot orders. - Investment mold casting:
Suitable for complex metal parts in medium to large quantities. - 3D Printing:
Preferred process for rapid prototyping, especially good in small quantities and at the design verification stage.
Small production quantities are often better suited for CNC machining or 3D printing, while large orders are better suited for casting or injection molding. Choosing the right process not only optimizes cost, but also improves productivity.
4. Evaluation of budget and time
- Cost Factors:
Processing costs consist mainly of material, process and post-processing costs. Others such as mold development and sample testing costs also need to be included in the budget. - Time factor:
Urgent lead times may increase processing costs. If time permits, try to choose a standard production cycle to minimize expediting costs. In addition, it is recommended to set aside a certain buffer time to deal with possible emergencies.
5. Your Pre-Quote Checklist
Before you hit “send” on that RFQ, run through this list:
- Complete 3D CAD files (STEP or IGES format)
- 2D PDF drawings with critical dimensions called out
- Material specification including grade and temper
- Quantity requirements (prototype and production)
- Tolerance requirements (highlight critical ones)
- Surface finish specifications
- Post-processing requirements (anodizing, heat treatment, etc.)
- Quality and inspection requirements
- Delivery timeline
- Contact information for technical questions
6. Selecting a reliable custom machining service provider
Selecting the right outsourcing service provider is crucial for achieving smooth and efficient collaboration. When choosing a machining partner, consider the following factors:
- Experience and Expertise:
Look for providers with extensive experience and advanced equipment. They can better understand your needs and offer professional guidance. - Track Record and Reputation:
Review their past projects and customer feedback to ensure their capabilities align with your requirements. - Communication Efficiency:
Effective communication helps prevent issues. Evaluate their responsiveness and problem-solving skills during initial interactions to determine reliability.
7. Summary
Proper preparation is essential for accurate quotes and smooth custom machining projects. Every step, from clarifying requirements to choosing materials and finding the right service provider, matters.
If you have questions about quote preparation, Allied Metal is here to help! With extensive experience and a skilled team, we offer free consultations, quotes, and expert advice to support your project. Contact us today, and let’s bring your designs to life!
