Editor's Note: This guide was updated on October 13, 2025, to include a detailed case study on developing a new product, showcasing the real-world value of our rapid prototyping services.`
Struggling to visualize your designs or spot flaws early? Rapid prototyping solves this by speeding up the process and reducing costs, helping you avoid delays and launch with confidence.
Rapid prototyping uses technologies like 3D printing to quickly create physical models from CAD data. This accelerates design validation, helps identify errors early, and significantly reduces development time and costs.
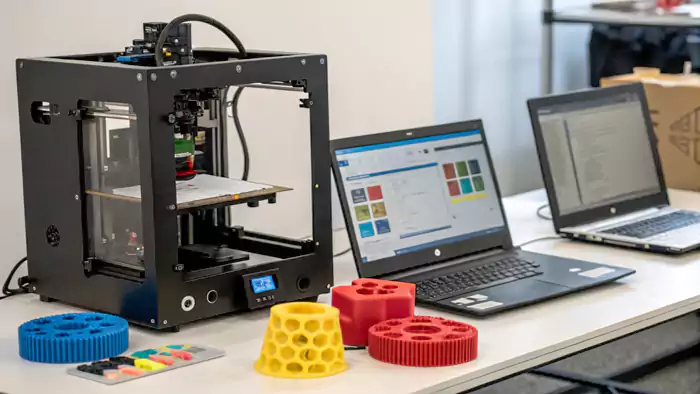
As someone who's spent years in CNC machining, I've seen how critical it is to get designs right before committing to metal. But even before that, being able to hold a part in your hand, test its fit, or show it to a client can be a game-changer. That's where rapid prototyping comes in. At Allied Metal, we've embraced these technologies alongside our CNC services because they let you quickly turn ideas into physical models. My experience shows it’s a smart way to spot flaws early and save a lot of time and money before jumping into full-scale production. It’s amazing how fast you can iterate these days, often using additive manufacturing or 3D printing techniques. For engineers like David, who are constantly innovating, this speed is invaluable. Let's explore how this process works and why it's become so essential.
What Is Rapid Prototyping Exactly?
You hear the term "rapid prototyping" a lot, but what does it truly mean for your design process? Is it just another buzzword, or a tangible way to improve your products?
Rapid prototyping (RP) is a set of techniques used to swiftly fabricate a physical part, model, or assembly from 3D Computer-Aided Design (CAD) data, primarily for visualization, testing, and design iteration.
Diving Deeper into the Concept of Rapid Prototyping
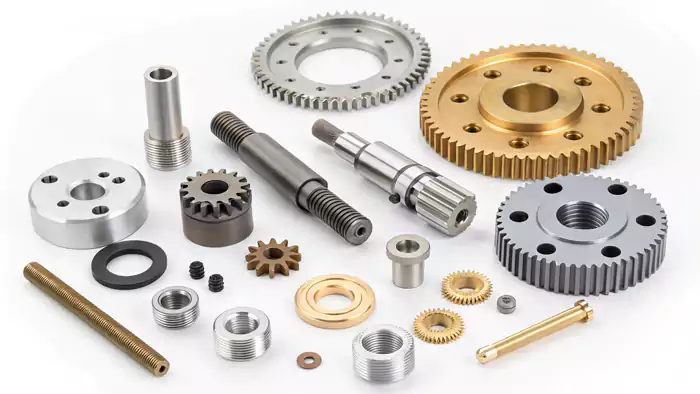
At its core, rapid prototyping is all about speed and iteration in the early stages of product development. The main goal is to create a tangible, physical object directly from a digital design in a very short amount of time – think hours or days, rather than weeks or months which traditional prototyping methods might take for complex parts. I’ve seen this speed up our clients' projects dramatically.
This isn't just about making something that looks like the final product; it's often about creating a model that can be used to:
- Visualize and Communicate Designs: A physical model is much easier for everyone – engineers, designers, clients, marketers – to understand and discuss compared to just a 2D drawing or a 3D rendering on a screen.
- Test Form, Fit, and Function: Engineers like David can use prototypes to check if parts assemble correctly, if a design feels right ergonomically, or even perform basic functional tests (depending on the prototype's material and build process).
- Identify Design Flaws Early: This is a huge one. Holding a part can reveal issues that weren't apparent in the CAD model. Catching these early, as my insight suggests, saves enormous amounts of money and time by preventing costly changes to production tooling later on.
- Iterate Designs Quickly1: Based on feedback from a physical prototype, designers can quickly modify the CAD model and produce a new version, sometimes within the same day. This agile approach leads to better final products.
Essentially, rapid prototyping bridges the gap between the digital world of CAD and the physical world, allowing for a much more dynamic and efficient design cycle. It empowers designers and engineers to experiment, learn, and refine with greater confidence.
What Are the Typical Rapid Prototyping Process Steps?
So you have a CAD model ready for prototyping; what happens next? Understanding the general workflow helps you prepare and know what to expect from the process.
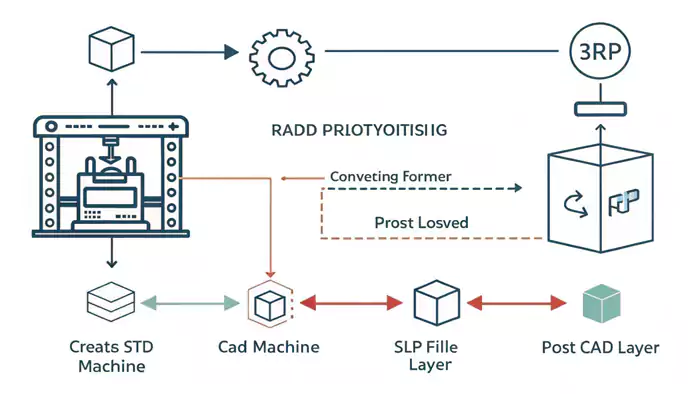
The rapid prototyping process generally involves creating a 3D CAD model, converting it to a suitable file format (like STL), setting up the RP machine, building the part layer by layer, and finally, post-processing.
Diving Deeper into the RP Workflow
While specific steps can vary slightly depending on the technology used, the general process flow for most rapid prototyping projects is quite consistent. Having incorporated these services at Allied Metal, I can walk you through how it typically unfolds:
-
- Everything starts with a three-dimensional digital model. Engineers like David are highly proficient with CAD software (like SolidWorks, AutoCAD, Catia, etc.) to design their parts with precise dimensions and geometries. This digital blueprint is the foundation.
-
File Conversion (e.g., to STL):
- Once the CAD model is complete, it needs to be converted into a file format that rapid prototyping machines can understand. The most common format is STL (Stereolithography or Standard Tessellation Language). An STL file describes the surface geometry of the 3D model using a mesh of triangles. Other formats like .OBJ or .3MF are also used, especially with newer technologies.
-
Machine Setup and File Preparation:
- The STL file is then loaded into specialized software for the chosen RP machine. Here, the operator will orient the part for optimal building, generate support structures if needed (these are temporary scaffolds for overhanging features), and "slice" the model into many thin, horizontal cross-sections or layers.
- The machine itself is prepared: materials are loaded (e.g., resin vats filled, powder beds prepared, filament spools mounted), and build parameters are set.
-
Automated Part Building:
- This is where the magic happens. The RP machine builds the part layer by layer, based on the sliced data. Additive manufacturing processes, as mentioned in my insights, are dominant here. Each layer is selectively solidified or deposited and fused to the previous one until the entire object is complete. This process is largely automated.
- Part Removal and Post-Processing:
- Once the build is finished, the part is carefully removed from the machine.
- Post-processing steps are often required. These can include:
- Cleaning: Removing uncured resin, excess powder, or soluble support materials.
- Support Removal: Breaking away or dissolving the temporary support structures.
- Curing: For some materials (like photopolymer resins used in SLA), an additional UV curing step might be needed to fully harden the part and achieve optimal mechanical properties.
- Finishing: Depending on the requirements, parts might be sanded, bead-blasted, painted, dyed, or have threaded inserts added.
After these steps, the physical prototype is ready for evaluation, testing, or presentation.
What Manufacturing Methods Are Available for Rapid Prototyping?
If you want to create a prototype quickly, what are your actual manufacturing options? Several technologies can turn your digital designs into physical objects fast.
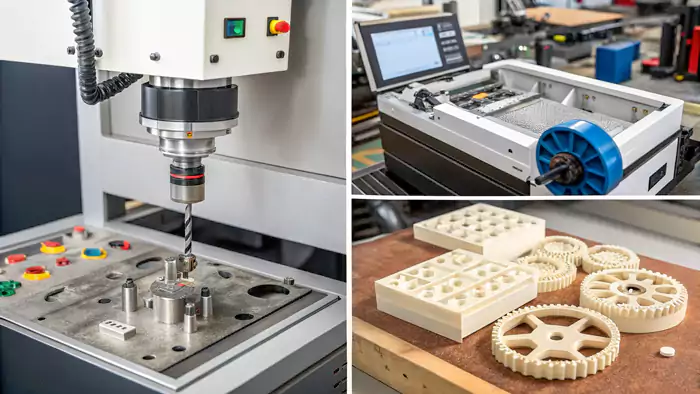
Common methods include various 3D printing techniques like SLA (Stereolithography), SLS (Selective Laser Sintering), FDM (Fused Deposition Modeling), and MJF (Multi Jet Fusion). Quick-turn CNC machining can also be used.
Diving Deeper into Prototyping Technologies
As my insight highlights, additive manufacturing, or 3D printing, is the star player in the rapid prototyping world. However, it's good to be aware of the main options, as each has its strengths. At Allied Metal, we leverage these depending on the client's specific needs.
Here are some prominent rapid prototyping methods:
Additive Manufacturing (3D Printing) Processes:
- Stereolithography (SLA):
- How it works: A UV laser selectively cures and solidifies photopolymer resin layer by layer in a vat.
- Pros: Excellent surface finish, high accuracy, fine feature detail. Good for visual models and form/fit prototypes.
- Cons: Materials can be brittle, often requires post-curing and support removal.
- Selective Laser Sintering (SLS):
- How it works: A high-power laser fuses or sinters powdered material (typically nylon or other polymers) together, layer by layer.
- Pros: Produces strong, durable parts; no support structures usually needed (unsintered powder supports the part). Good for functional prototypes with complex geometries.
- Cons: Surface finish can be slightly grainy; limited material color options without post-processing.
- Fused Deposition Modeling (FDM) / Fused Filament Fabrication (FFF):
- How it works: A thermoplastic filament is heated and extruded through a nozzle, depositing material layer by layer.
- Pros: Wide range of engineering-grade thermoplastics available (ABS, PLA, PETG, PC, Nylon), relatively low cost, fast for simpler geometries.
- Cons: Visible layer lines, lower resolution and accuracy compared to SLA/SLS, support structures often needed.
- Multi Jet Fusion (MJF):
- How it works: A fusing agent is selectively jetted onto a bed of nylon powder, followed by a detailing agent for sharp edges. An infrared source then fuses the areas with the fusing agent.
- Pros: Fast build speeds, good part strength, consistent mechanical properties, fine detail.
- Cons: Primarily nylon-based materials, parts are typically gray/black but can be dyed.
- Direct Metal Laser Sintering (DMLS) / Selective Laser Melting (SLM):
- How it works: Similar to SLS but uses metal powders (e.g., aluminum, stainless steel, titanium) and a more powerful laser to melt and fuse them.
- Pros: Produces strong, functional metal prototypes and end-use parts.
- Cons: Higher cost, more intensive post-processing usually required.
Subtractive Rapid Prototyping:
- Quick-Turn CNC Machining:
- How it works: Material is removed from a solid block using cutting tools on a CNC machine.
- Pros: Can use production-intent materials, excellent accuracy and surface finish, strong parts.
- Cons: Can be more expensive for very complex geometries (better suited for simpler forms in a "rapid" context), limitations based on tool access.
The choice of method depends heavily on what David or any engineer needs their prototype to do – is it for looks, for feel, or for function?
What Are the Key Advantages of Rapid Prototyping?
Why should you incorporate rapid prototyping into your workflow? The benefits go beyond just speed, significantly impacting design quality, cost, and time-to-market.
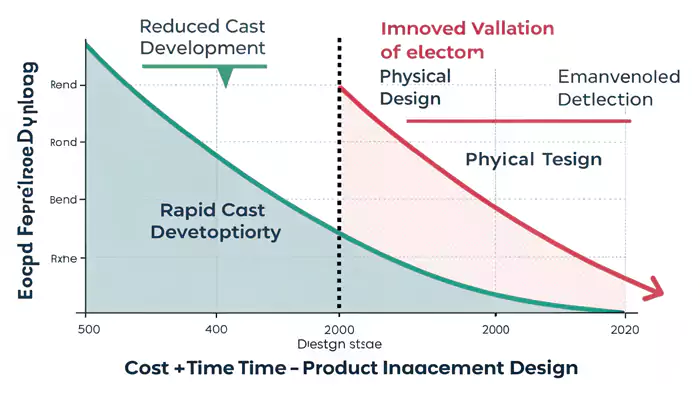
Rapid prototyping offers reduced development time, lower costs by catching errors early, improved design validation through physical models, enhanced communication, and the ability to perform early functional testing.
Diving Deeper into the Benefits
From my experience helping clients bring their designs to life, the advantages of rapid prototyping are clear and compelling. It’s not just a fancy technology; it delivers real business value. For an engineer like David, these benefits can directly address many of his challenges:
-
Significantly Reduced Development Time:
- This is the most obvious one. Creating physical models in hours or days, instead of weeks, allows the entire product development cycle to be compressed. Multiple design iterations can happen in the time it might have taken to get one traditional prototype.
-
Lower Costs by Catching Errors Early:
- As my insight states, this is crucial. Identifying a design flaw in a $100 prototype is vastly cheaper than finding it after investing tens of thousands of dollars in production tooling. This early error detection prevents expensive rework and material wastage down the line.
-
Improved Design Validation and Optimization:
- Holding a physical part, testing its fit with other components, or feeling its ergonomics provides invaluable feedback that on-screen CAD models can't fully replicate. This leads to more refined and optimized designs.
-
Enhanced Communication and Collaboration:
- Physical prototypes3 are powerful communication tools. They make it easier for designers, engineers, marketing teams, and clients to understand a concept, provide feedback, and get on the same page. I've seen prototypes clear up misunderstandings instantly.
-
Ability to Perform Early Functional Testing:
- Depending on the RP technology and material used (like SLS nylon or MJF parts, or even quick CNC machined parts in engineering plastics), prototypes can often withstand some level of functional testing. This helps verify mechanical aspects of a design.
-
Reduced Risk:
- By thoroughly testing and iterating designs with low-cost prototypes, the risk associated with committing to mass production is significantly lowered. There's greater confidence that the final product will work as intended.
-
Customization and Small-Batch Production:
- While the focus is often on "prototyping," many RP technologies are also suitable for creating custom one-off parts or small batches of end-use components quickly and cost-effectively.
For David, who values efficiency and adherence to tight project deadlines, these advantages directly translate into smoother projects and more successful product outcomes.
Rapid Prototyping vs. Prototyping: Is There a Real Difference?
You might hear "prototyping" and "rapid prototyping" used interchangeably. Are they truly the same, or does "rapid" signify a distinct approach to creating preliminary models?
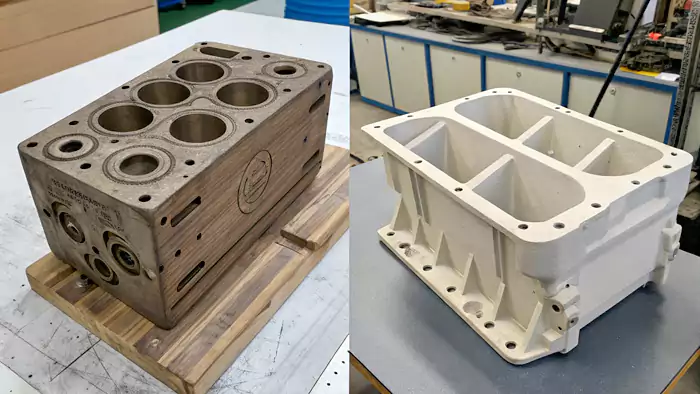
Prototyping is the general act of creating an early model. Rapid prototyping specifically refers to using fast fabrication technologies, primarily additive manufacturing, to create these models much quicker than traditional methods.
Diving Deeper into the Nuance
This is a good point of clarification because the terms can sometimes blur. While all rapid prototyping is a form of prototyping, not all prototyping is "rapid" in the modern sense.
Prototyping (General Term):
- This is the broad act of creating a preliminary version or model of a product. The goal is to evaluate a design, test functionality, gather feedback, or demonstrate an idea before committing to full-scale production.
- Prototyping has been around for as long as people have been making things. It could involve:
- Hand-crafting models from wood, clay, or foam.
- Machining parts using conventional (non-CNC) lathes and mills.
- Creating simple mock-ups from cardboard or other basic materials.
- These traditional methods can be time-consuming and may require significant manual skill, especially for complex designs.
Rapid Prototyping (Specific Approach):
- This term emerged with the advent of technologies that could dramatically speed up the creation of physical models directly from digital data.
- As my insight points out, it primarily leverages additive manufacturing (3D printing) techniques, but can also include highly automated and quick-turnaround subtractive methods like CNC machining when applied specifically for speed in a prototyping context.
- The "rapid" aspect refers to the significant reduction in time taken to produce the physical object compared to older, more manual methods.
- Key characteristics include:
- Direct from CAD: Models are built directly from 3D digital files.
- Automated Build: The fabrication process is largely machine-driven.
- Speed: Prototypes can often be produced in hours or a few days.
- Complexity for Free (often with additive): Additive methods can create highly complex internal geometries or intricate features with little to no added difficulty compared to simpler shapes.
So, think of "prototyping" as the overall objective or stage in product development. "Rapid prototyping" describes a specific set of modern tools and techniques used to achieve that objective much faster and often with greater design freedom. For an engineer like David, focusing on quick iteration and precise parts, rapid prototyping technologies are indispensable.
Is Rapid Prototyping the Same as 3D Printing?
The terms "rapid prototyping" and "3D printing" are frequently linked. Are they interchangeable synonyms, or does one encompass the other in a specific way?
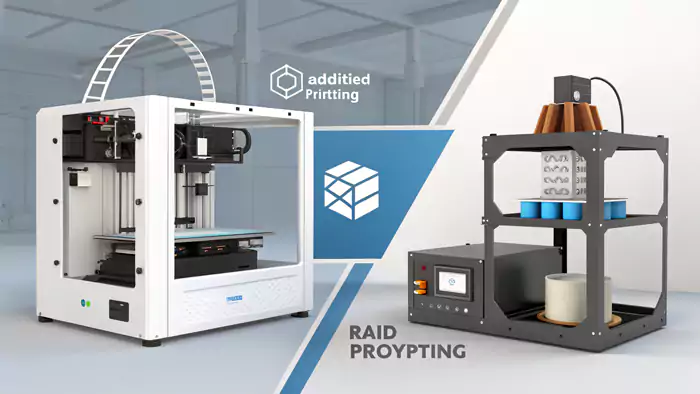
No, not exactly. 3D printing (additive manufacturing) is a primary set of technologies used for rapid prototyping. Rapid prototyping is the application or goal; 3D printing is a key method to achieve it quickly.
Diving Deeper into the Relationship
This is a common point of confusion, and it’s good to be precise. While 3D printing plays a massive role in rapid prototyping, they aren't entirely synonymous.
Here's how I explain it:
-
Rapid Prototyping (RP): This is the application or the process objective. It refers to the overall strategy of quickly creating physical models to test, validate, and iterate designs. The goal is to get a prototype made fast.
-
3D Printing (Additive Manufacturing): This is a category of manufacturing technologies that build objects layer by layer from digital data. It's a method or a tool. Because 3D printing is inherently fast for producing one-off or small batches of complex parts directly from CAD, it has become the dominant and most recognized technology for achieving rapid prototyping. My insight specifically mentions additive manufacturing/3D printing as the usual creation technique for RP.
Think of it like this:
- If your goal is "rapid transportation" (getting somewhere fast), a "car" or an "airplane" could be the method.
- If your goal is "rapid prototyping" (getting a model made fast), "3D printing" is a very common and effective method.
Can other methods be used for Rapid Prototyping?
Yes, although 3D printing is the most prominent. For example:
- Quick-Turn CNC Machining: If a shop can program and machine a relatively simple part from a stock material (like plastic or aluminum) in a very short timeframe (a day or two), this could also be considered a form of rapid prototyping, especially if the goal is to quickly get a part with true engineering material properties. At Allied Metal, we combine our CNC expertise with 3D printing, so we understand both approaches.
- Rapid Casting (using 3D printed patterns): Creating a mold quickly (e.g., silicone molds from a 3D printed master pattern) to cast a few prototype parts could also fall under the broader umbrella of rapid prototyping techniques.
However, when most people say "rapid prototyping" today, they are very often implicitly referring to processes involving 3D printing due to its speed, versatility, and ability to create complex geometries directly. For David, understanding that 3D printing is his primary go-to for rapid prototypes is accurate, but knowing RP is the broader strategy is also useful.
How Do You Choose the Right Rapid Prototyping Tool or Method?
With various rapid prototyping technologies available, how do you select the one best suited for your specific project needs? Making the wrong choice can impact prototype quality, cost, and speed.
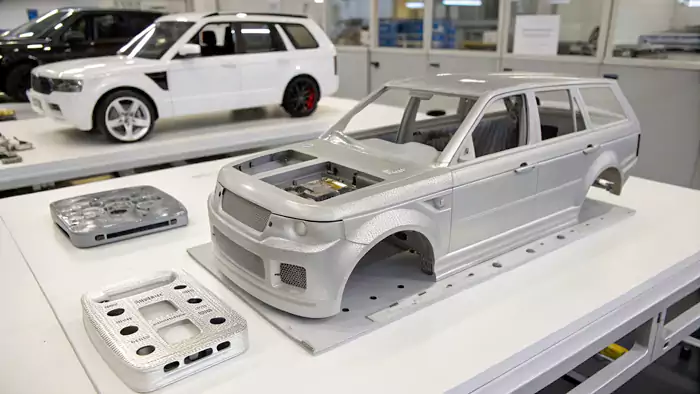
Consider the prototype's purpose (visual, form/fit, functional), required material properties, desired accuracy and finish, quantity needed, speed, and budget. No single method is best for everything.
Diving Deeper into Method Selection
Choosing the right rapid prototyping method is crucial for getting the results you need efficiently. As someone who offers various manufacturing services, I always advise clients to think carefully about what they want their prototype to do. For an engineer like David, this involves matching the technology to the engineering requirements.
Here are key factors to consider:
-
Purpose of the Prototype:
- Visual Models/Concept Demonstration: If you mainly need to show the shape, size, and aesthetics, methods like SLA (for smooth finish) or even FDM (for lower cost) might be suitable.
- Form and Fit Testing: To check how parts assemble or fit in an enclosure, accuracy is important. SLA, MJF, SLS, or precise FDM could work.
- Functional Testing: If the prototype needs to withstand mechanical stress or perform a function, material properties are key. SLS (nylon), MJF (nylon), FDM (engineering thermoplastics like ABS, PC, Nylon), or quick-turn CNC machining in the actual target material (or a close simulant) would be better choices.
-
Required Material Properties:
- Does it need to be strong, flexible, heat-resistant, transparent, or biocompatible? Different RP technologies offer different material palettes. For example, FDM has a wide range of thermoplastics, while SLA resins vary in their mechanical properties. Metal prototypes would require DMLS/SLM or CNC.
-
Geometric Complexity, Feature Detail, and Accuracy:
- For very intricate details, fine features, and smooth surfaces, SLA and MJF often excel.
- SLS is good for complex internal geometries as it doesn't typically require support structures.
- FDM might struggle with very fine details or extreme overhangs without well-designed supports.
- CNC machining offers high accuracy but has limitations with certain internal geometries.
-
Quantity Needed:
- Most RP methods are best for one-offs or very small batches (1-100 parts). If more are needed, some methods (like MJF or SLS with good nesting) can be more economical than others. For slightly larger "prototype" runs, rapid tooling (creating a quick mold for injection molding) might become a consideration, which is a step beyond direct RP.
-
Speed and Urgency:
- How quickly do you need the part? Some FDM prints can be very fast for simple parts. MJF is known for speed in producing multiple parts. SLA and SLS build times depend on part size and complexity.
-
Budget:
- Costs vary significantly. FDM is often the most budget-friendly for basic prototypes. SLA can be moderate. SLS, MJF, and DMLS/SLM are generally more expensive due to machine and material costs. Quick CNC costs depend on complexity and material.
I often suggest clients like David create a small checklist: "What does this prototype absolutely need to achieve?" This helps narrow down the options and select the most effective and economical RP tool for that specific stage of development.
When Should You Use Rapid Prototyping, and How Can You Reduce Costs?
Knowing the "what" and "how" is great, but when is rapid prototyping most beneficial, and are there ways to make this speedy process more budget-friendly?
Use rapid prototyping for early design validation, form/fit checks, and creating quick functional models. Reduce costs by optimizing designs for the chosen process, selecting appropriate materials, and batching parts.
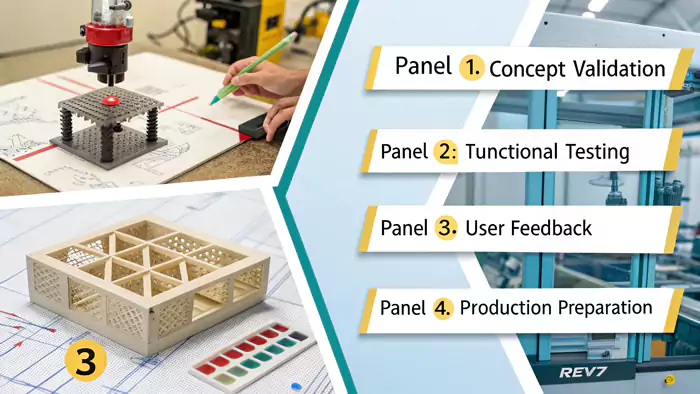
Diving Deeper into Application and Cost Optimization
Rapid prototyping is a powerful tool, but knowing when to deploy it and how to manage its costs can make it even more effective. From my experience at Allied Metal, helping clients like David streamline their development, here’s my take:
When to Use Rapid Prototyping:
- Early-Stage Design Validation: As soon as you have a workable CAD model, create a prototype to get a feel for the design, catch obvious errors, and test basic concepts. This is where it truly shines for saving future headaches.
- Form, Fit, and Ergonomic Testing: Before committing to expensive tooling, use RP to ensure parts assemble correctly, fit within enclosures, or feel right in a user's hand. I’ve seen many "aha!" moments when an engineer first holds a prototype.
- Communicating with Stakeholders: A physical model is invaluable for design reviews with non-technical team members, clients, or investors.
- Limited Functional Testing: For testing specific mechanical functions, especially with stronger materials from SLS, MJF, FDM, or CNC.
- Creating Custom Jigs, Fixtures, or Tools: RP can quickly produce custom manufacturing aids.
- Generating Marketing Samples or Display Models: Before full production is ready, prototypes can be used for photoshoots or trade shows.
- When Design Iteration is Expected: If you anticipate multiple design changes, RP allows you to cycle through these changes quickly and affordably.
How to Reduce Rapid Prototyping Costs:
My insight about saving time and money before full-scale production is key here. Here are some practical tips:
- Optimize Design for the Chosen RP Process:
- Minimize Material Usage: For 3D printing, can you hollow out the model (if strength allows) or use infill patterns (for FDM)?
- Reduce Support Structures (for applicable 3D printing): Orient parts to minimize overhangs. Supports add material cost and post-processing time.
- Simplify Geometry (for CNC): For rapid CNC, simpler geometries machine faster.
- Choose the Right Material: Don't over-specify. If it's just a visual model, a lower-cost resin or filament might be fine. Select the most cost-effective material that meets the prototype's specific needs.
- Select Appropriate Resolution/Layer Height (for 3D printing): Higher resolution means finer detail but longer print times and potentially higher cost. If fine detail isn't critical, a coarser resolution can save time and money.
- Batch Parts: If you need multiple small parts, printing them together in one build can often be more economical than separate runs, especially with powder-bed systems like SLS or MJF where packing density matters.
- Consider Scale: If a full-scale model isn't strictly necessary for initial validation, consider a smaller scale model to save material and time.
- Communicate Clearly with Your RP Provider: Provide clear requirements and discuss your budget. A good provider can often suggest ways to optimize your design for cost-effectiveness.
By strategically using rapid prototyping and being mindful of these cost-saving measures, engineers like David can significantly accelerate their development cycles while keeping budgets in check.
Conclusion
Rapid prototyping, mainly via 3D printing, quickly turns digital ideas into physical models. It accelerates design, spots flaws early, and cuts development costs effectively.
Footnotes:
-
Exploring this topic can provide insights into improving your design workflow and achieving better results faster. ↩
-
Explore this link to understand the foundational role of 3D CAD models in rapid prototyping, enhancing your design knowledge. ↩
-
Explore how physical prototypes enhance communication and collaboration among teams, leading to better project outcomes. ↩

