Last updated on February 26, 2026, by Lucy
Many engineers rush into production before validating their design. I have seen costly rework happen because the wrong process was chosen too early.
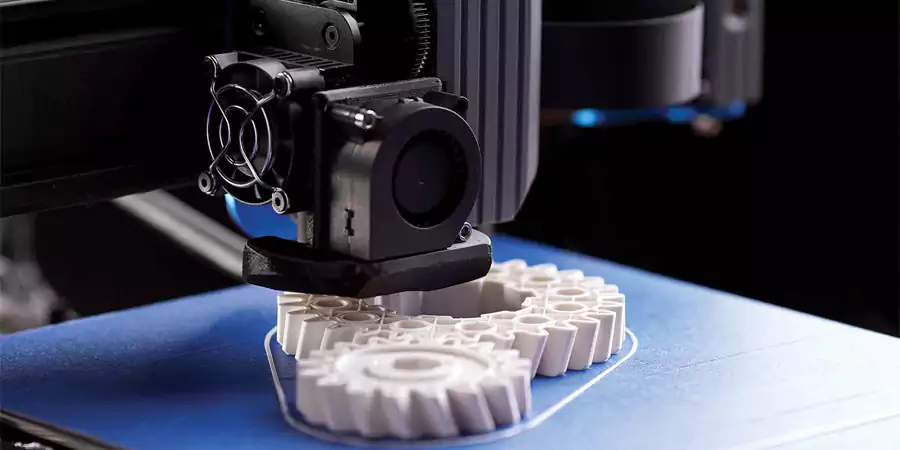
FDM 3D printing is a process that melts thermoplastic filament and deposits it layer by layer to build a part. It is fast and low cost for prototypes and low-load parts, but it cannot replace CNC machining for tight tolerances or high-strength applications.
If someone is new to additive manufacturing, I usually suggest starting with a clear explanation of what 3D printing is. Once the fundamentals are clear, it becomes easier to understand where FDM fits within industrial manufacturing.
I work with engineers who need parts quickly. I also work with buyers who need reliability. I always tell them the same thing. Use the right process at the right stage. If you understand where FDM fits, you save time and money. If you misuse it, you pay later.
What Is FDM 3D Printing — and When Does It Make Sense for Industrial Projects?
Many buyers hear “3D printing” and think it solves every problem. That assumption creates risk in real projects.
FDM, or Fused Deposition Modeling, builds parts by extruding heated thermoplastic filament layer by layer. It works best for rapid prototypes, fixtures, enclosures, and low-load components. It is not suitable for high-precision, high-temperature, or load-bearing end-use metal parts.

How the Process Works
I feed a thermoplastic filament into a heated nozzle. The nozzle melts the material. The printer deposits material layer by layer. The part builds from bottom to top. The bonding happens as each hot layer fuses to the previous one.
In industrial environments, FDM is often part of a broader rapid prototyping workflow. At Allied Metal, our 3D printing capabilities support early-stage validation before we move into precision machining.
This process has three clear advantages:
- No mold or tooling
- Fast setup
- Low upfront cost
I often use FDM for:
- Functional concept validation
- Assembly fit checks
- Jigs and fixtures
- Housing prototypes
- Low-load plastic components
When It Does Not Make Sense
I do not use FDM for:
- High-precision mating parts
- Parts exposed to high temperature
- Structural load-bearing components
- Final metal production parts
When the part must meet strict tolerance or long-term durability requirements, I follow the principles outlined in our ultimate guide to CNC machining. That process delivers repeatability and structural strength that FDM cannot match.
Case Study: Industrial Automation Bracket
I supported a robotics client who needed a sensor bracket for testing. The engineer wanted to validate geometry before machining aluminum.
Here were the prototype specs:
| Parameter | Value |
|---|---|
| Material | ABS |
| Layer Height | 0.2 mm |
| Dimensional Tolerance | ±0.3 mm |
| Print Time | 9 hours |
| Quantity | 3 pcs |
| Function | Fit and cable routing test |
The team validated fit in one day. After changes, we switched to CNC aluminum for production.
That saved two CNC revision cycles and reduced overall development time by nearly two weeks.
Mechanical Properties, Accuracy & Design Constraints You Must Know?
Many engineers treat FDM parts like molded plastic or machined plastic. That creates failures later.
FDM parts typically achieve ±0.2 mm to ±0.5 mm tolerance depending on size and geometry. They have anisotropic strength due to layer bonding and limited heat resistance. They are not suitable for high-load or precision applications.

Dimensional Accuracy
Typical FDM tolerance1 ranges from ±0.2 mm to ±0.5 mm. Large parts may have more deviation. Warping can occur in ABS and similar materials.
If your part requires ±0.02mm tolerance or load-bearing performance, CNC machining is usually more appropriate.
Layer Adhesion and Strength2
FDM parts are anisotropic. Strength along the layer direction differs from strength between layers. If force pulls across layers, failure risk increases.
I once tested a nylon FDM part under tensile load. The Z-direction strength was 35% lower than the X-Y direction. That difference matters in industrial use.
Heat Resistance
Material selection matters:
| Material | Heat Deflection Temp (Approx.) |
|---|---|
| PLA | 55–60°C |
| ABS | 90–100°C |
| Nylon | 120°C |
| PC | 130°C |
If the part sits near a motor or gearbox, I do not rely on low-grade filament.
Thread and Surface Considerations
Printed threads3 can strip easily. I usually add brass inserts or machine threads after printing. Surface finish is layered and rough. Post-processing may include sanding or secondary machining.
When engineers compare additive and subtractive manufacturing, they often ask which one is better. I explain the differences clearly in our breakdown of CNC machining vs 3D printing. Each method has strengths. The key is using them at the right stage.
Cost Structure: Why FDM Is Cheap — and Where the Hidden Limits Are?
Many buyers see a low quote and think FDM is always cheaper. That thinking is incomplete.
FDM is cost-effective because it requires no tooling and has low equipment cost. It works well for 1–50 pieces. However, it has lower durability and higher variability compared to CNC machining.

Why It Is Affordable
- No mold cost
- Minimal setup
- Short lead time
- Low material waste
For early development, this matters.
FDM reduces iteration cost4.
CNC ensures final production reliability.
Decision Logic for Buyers
| Scenario | Recommended Process |
|---|---|
| Visual prototype | FDM |
| Functional low-load test | FDM |
| Tight tolerance mechanical part | CNC |
| End-use metal component | CNC |
I often tell engineers this. Use FDM to discover design flaws early. Then switch to CNC for final parts that must perform in the field.
Hidden Limits
FDM machines can vary in calibration. Layer adhesion can vary by operator. Environmental humidity affects material performance.
For production reliability, CNC machining provides consistent dimensional control and predictable material properties. That difference becomes critical in automotive, medical, and industrial applications.
From FDM Prototype to CNC Production: A Smarter Hybrid Strategy?
Many teams try to force one process to do everything. That approach increases cost over time.
A hybrid strategy uses FDM for rapid prototyping and design validation, then transitions to CNC machining for precision and durability. This reduces development cycles and ensures production-ready performance.

Step 1: Rapid Validation
I print the first concept within 24 hours. The engineer checks fit and assembly. Design flaws appear early. Changes cost little.
Step 2: Design Optimization
We adjust wall thickness. We improve mounting holes. We confirm clearances. We refine geometry before machining metal.
Step 3: CNC Production
After validation, we move to CNC precision machining. We achieve ±0.02 mm tolerance. We ensure structural strength. We deliver consistent quality for production runs.
Real Manufacturing Benefit
I have seen engineers try to use FDM for final production parts. They later faced failure under load or heat. They paid twice.
FDM is not a replacement for CNC.
It is a cost-saving step before CNC production.
When I combine rapid prototyping with precision machining under one supplier, I shorten quoting time. I improve DFM communication. I reduce overall development risk.
Conclusion
FDM helps you validate ideas quickly and affordably. CNC machining ensures precision and durability. A smart hybrid strategy reduces risk, saves cost, and accelerates industrial production.
-
Explore this link to understand the precision limits of FDM printing and how it impacts your part's accuracy and quality. ↩
-
Learn why FDM parts have anisotropic strength and how layer orientation influences mechanical performance for better design decisions. ↩
-
Explore this link to learn effective techniques for enhancing the strength and reliability of printed threads in 3D printing projects. ↩
-
Explore how FDM lowers iteration costs to speed up early design phases and save money on prototypes. ↩
