Editor’s Note: Last modified on November 6, 2025, by Lucy
Your design is complex, but choosing the wrong machine will spike costs or make the part impossible. A 3-axis shop may “no-quote” it, while a 5-axis shop seems too expensive.
The difference between 3, 4, and 5-axis machining is the number of directions the tool and/or part can move. 3-axis is for simple parts, while 5-axis machines complex geometries in a single setup, saving time and increasing precision.
I’ve been running CNC machines for over 20 years. For a sourcing manager or an engineer, the “axis” count isn’t just a technical spec—it’s the single biggest factor in your part’s cost, lead time, and final quality. A 3-axis shop might need five different setups and custom fixtures to make your part. A 5-axis shop can do it in one setup, making it cheaper and more accurate. Understanding this difference is the key to sourcing your parts like an expert. Let’s break down what you really need to know.
What Is 3-Axis CNC Machining?
Got a part that’s relatively simple, like a flat plate or a simple bracket? 3-axis milling is the most common and cost-effective way to make it.
3-axis CNC milling is a process where the cutting tool moves along three linear axes (X, Y, and Z) relative to a stationary workpiece. This is ideal for 2D and 2.5D geometries.

Diving Deeper into 3-Axis
This is the workhorse of the machine shop. The cutting tool moves left-to-right (X-axis), front-to-back (Y-axis), and up-and-down (Z-axis). It’s perfect for parts where all the machining is done from a single side, like:
- Drilling holes in a mounting plate
- Cutting out a profile (like a logo)
- Milling shallow pockets or slots
The limitation is clear: it can’t machine the sides or the bottom of the part. If you have features on multiple sides, the machinist has to manually stop the machine, unclamp the part, flip it, re-clamp it, and find a new “zero” point. This is called a “setup,” and it adds significant time and potential for error.
What Is 4-Axis CNC Machining?
Need to machine features around a cylinder, like a shaft with a keyway or a spiral groove? That’s where 4-axis machining comes in.
4-axis machining adds a single rotational axis (the A-axis) to the standard 3-axis setup. This allows the workpiece to be rotated, enabling machining on different sides of the part without a new setup.
Diving Deeper into 4-Axis
The 4th axis is a game-changer because it eliminates some of those manual setups I just mentioned. By mounting the part on a rotary indexer, the machine can automatically rotate it to present a new face to the cutting tool. For example, we can machine a hole on the front, then tell the machine to rotate the part exactly 90 degrees and machine a slot on the side. This is called “indexing,” and it’s far more accurate than having an operator do it by hand. It’s also used for “simultaneous” 4-axis work, like cutting a cam lobe or a helical groove on a shaft.
What Is 5-Axis CNC Machining?
Have a truly complex part, like a medical implant, an aerospace impeller, or a mold with organic curves? This is the king of CNC machines.
5-axis machining adds a second rotational axis (the B-axis) to the 4-axis setup. This allows the tool to approach the workpiece from all five sides in a single setup, enabling highly complex geometries.
Diving Deeper into 5-Axis
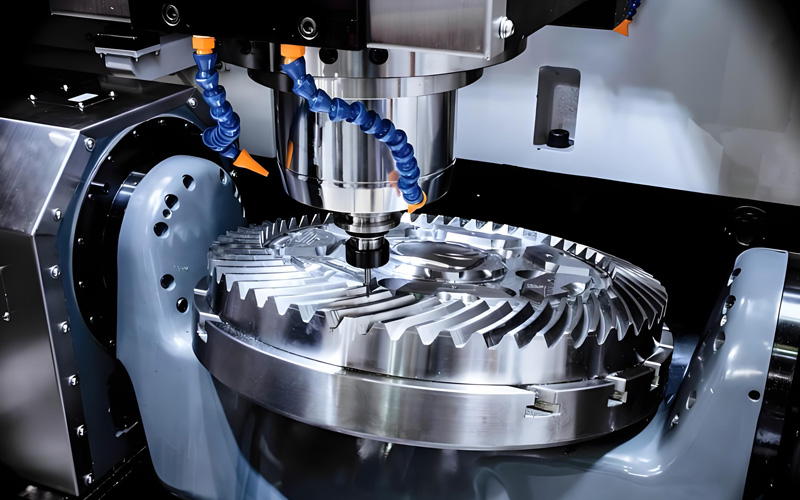
This is where manufacturing gets incredible. With a 5-axis machine, the tool can tilt and the table can rotate at the same time the part is being cut. This “simultaneous” motion allows us to:
- Machine complex, “organic” 3D surfaces like turbine blades or body-worn medical devices.
- Use shorter, more rigid cutting tools because the machine can “tilt” the tool to avoid colliding with the part. Shorter tools mean less vibration, which results in a much better surface finish.
- Drill holes at compound angles.
- Complete an entire part (top, bottom, and all four sides) in one single setup. This is the key. It eliminates almost all human setup error, making it the most precise and, for complex parts, the fastest method available.
What Is the Main Difference Between 3, 4, and 5-Axis?
The core difference is the complexity of the part they can create, the number of setups required, and the cost. 3-axis is simple and cheap. 5-axis is for complex parts, is highly precise, and can be more cost-effective for those parts by eliminating setup time.
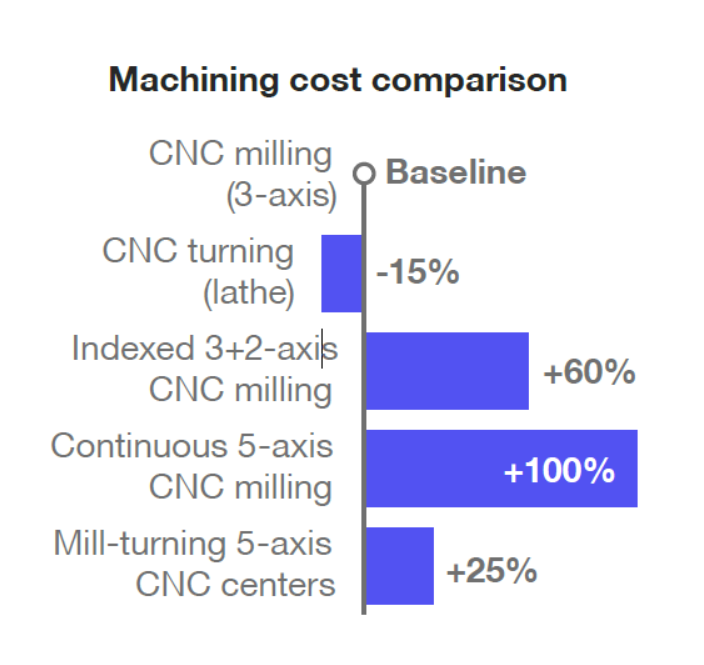
1. Cost:
Remember, the more the number of axes; the more will be the price. So, you will find that the cost of using the 5-axis machine will be higher than the others.
2. Features:
The three machines come with different features.
For example, the 3-axis machine cannot handle angled features while the other two can.
The 4- axis machining comes with three axes but with an additional rotation on the X-axis.
The 5- axis machining has a three-axis and an additional three rotation. Moreover, the 5-axis does an excellent job of handling complex angles.
3. Numbers and Axis Movement:
The 3- axis has three axes. Besides, it can perform three movements, including left-right, front-back, and up-down.
The 4-axis has three axes with one rotation.
Finally, the 5-axis has three axes and two rotations.
4. Flexibility, Accuracy, and Efficiency:
The 5-axis machine has higher accuracy, increased productivity, and efficiency.
The 4-axis has lower accuracy than the 5-axis machining but higher than the 3- axis.
The 3- axis machining has a lower level of accuracy and productivity than the 4-axis machining.
5. Applications:
The 3- axis machining moves the three axes continuously at the same time. You will find the 3-axis machining is suitable mainly for drilling holes, cutting sharp edges, milling slots, and automatic operation.
The 4- axis machining has the tree axis of X, Y, and Z plus the addition A-axis by rotation. It works excellent on cylindrical surfaces.
The 5-axis machining can perform complex functions mostly preferred for aerospace, medical, military, oil, and gas mechanical parts.
From the Shop Floor: A 5-Axis Case Study
Let me show you a real-world example of why 5-axis matters. We had a client in the aerospace industry come to us for an Actuator Housing—a critical part for a flight control system.
The Challenge: The part was machined from a solid block of 7075-T6 Aluminum. The problem was that it had four angled hydraulic ports on different faces, plus a complex, deep pocket on the inside for the valve body. Every single one of these features had to be perfectly aligned with each other.
Key Part Specs & The “Shop-Floor Truth”:
- Part: Aerospace Actuator Housing
- Material: 7075-T6 Aluminum
- Critical Tolerance 1 (Geometric): The True Position of the four angled ports, relative to the main bore, was Ø 0.05 mm. This is an incredibly tight callout for features on different planes.
- Critical Tolerance 2 (Feature): The main bore had a Flatness callout of 0.01 mm on the sealing face.
How We Solved It: A 3-axis shop would have to make six separate setups for this part. They’d have to machine a face, flip it, re-indicate it, machine another, create an angled fixture, machine the first port, create another angled fixture for the second port… The risk of “tolerance stack-up” and scrapping a $500 block of aluminum was huge.
We put this part on our 5-axis mill.
- We clamped the part one time in a precision vise.
- The machine first milled the main pocket (Face 1).
- Then, the machine automatically rotated the part 90 degrees and tilted it 25 degrees to drill and tap the first angled port (Face 2).
- It then rotated 180 degrees, tilted 45 degrees, and did the second port (Face 3).
- It repeated this for all features, all in one single setup.
The Result: We ran the entire batch of 50 parts with zero scrap. Every part was identical, and all features were perfectly aligned because they were all machined relative to the same “zero” point. The total cycle time was high, but the setup time was only 30 minutes, compared to the 8+ hours of setup a 3-axis machine would have needed. For the client, this meant they got a more accurate, reliable part, faster than the “cheaper” 3-axis method would have been.
How to Choose the Right CNC Machining?
Here’s my simple rule of thumb:
- Pick 3-axis if your part is mostly flat or 2.5D
- Go with 4-axis if you’re working with cylinders or need indexed angles
- Choose 5-axis for complex, organic, or tight-tolerance parts
Also, consider:
- Budget: More axes = higher cost
- Lead time: 5-axis can often complete parts faster despite higher hourly rates
- Volume: For high volumes, fewer setups mean lower cost per part
My advice? Don’t just think about machine cost—think about total part cost. A cheaper 3-axis job that requires three setups might end up costing more than a single 5-axis run.
When in doubt, send us your drawings. We’ll tell you exactly which process gives you the best quality for your budget. That’s the Allied Metal promise.
